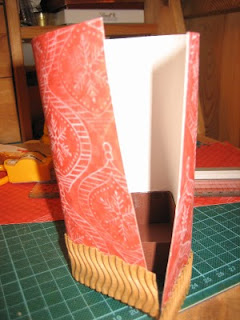
Today I want to share with you how I made my Bag, I ever read a tutorial about this but I forget where??? also I hope this tutorial is useful for you my friends :)
1. Cut the Brown Paper 11,45 cm x 11,45 cm. I draw the line 2,55 cm from each edge.
2. On the left side cut on each horizontal line in to the vertical line. Do the same thing on the right side.
3. Fold the four sides up, placing the tabs on the inside.
4. Adhere the tabs to the inside I used my UHU Stick.
5. Stamped so many ornament on the Design Paper and covered the under side with wavy kraft paper.
6. Covered the Box with Design Paper (28 cm x 14 cm) and Attention please NOT fold at the corners all the way up to the top of the bag though! Only at the box so it's adhered nicely around the corners of the box. Then I punch the Design Paper with my Fiskar Round Puncher (the Round punch is approximately 2") at the top middle area (for put the Handles).
8. I don’t have any CutlleBug Machine also I used this cutting system to make my Round Handles. I put my Handles with 2 brads in each side of the Bag.
9. Here is the way I made my Ornament : Stamp the Ornament with red ink and gave clear embossing powder and heat it.
10. I used Ranger Tea Dye for the out side of the ornament, the inside I used Mustard Seed to coloring. I used my Sponge only.
16. This is my Tag Finish :)
Thanks for looking and I hope this tutorial is useful :)
Love,


great tutorial Monika. Love the bag and I must give it a try
ReplyDeleteThank you for taking the time to show us the tutorial, Monika! Love both your bag and tag!
ReplyDeletethank you for the great tutorial ! I'll save it !
ReplyDeletewonderful tutorial. very pretty project, Monika!
ReplyDeletethat's so cool......sist.....
ReplyDeletesuch a brilliant tutorial
Congrats Monika! the tutorial is great. Thanks for sharing.
ReplyDeleteI'm doing fine, hey girl, there is something in my blog for you. Let me know when see it. Hugs, Zulma.
Great tutorial and great project. Really pretty.
ReplyDeleteClever idea, Nika.. Good job on both the bag and the tag. Did you enter this for HA challenge. too?
ReplyDelete